前言
在 Nginx 上开启 HTTP/3 能带来不少性能和安全上的提升,这主要得益于其底层使用的 QUIC 协议(一种基于 UDP 的现代传输协议)。下面我用一个表格梳理了一下:
| 好处类型 | 具体说明 | 主要原因/技术 |
|---|---|---|
| 性能提升 | 降低延迟,减少网络拥塞,适应高并发场景 | 基于UDP、0-RTT连接重用、多路复用、改进的拥塞控制 |
| 用户体验优化 | 页面加载更快,移动网络体验更顺畅,弱网环境下更稳定 | 连接迁移、更好的丢包恢复机制 |
| 安全增强 | 默认加密,减少中间人攻击风险 | 内置 TLS 1.3、放大攻击防御机制 |
| 技术优势 | 解决队头阻塞,面向未来 | QUIC 流级别多路复用、协议发展趋势 |
注意事项
虽然 HTTP/3 好处很多,但在 Nginx 上启用时也需要考虑以下几点:
-
Nginx 版本与编译需求:需要使用 Nginx 1.25.0 或更高版本。
-
实验性功能:目前 Nginx 中的 HTTP/3 支持在某些版本中可能仍标记为实验性(experimental)。生产环境部署前务必充分测试。
-
客户端支持:主流现代浏览器(Chrome、Firefox、Edge 等)均已支持 HTTP/3,但仍需考虑旧版客户端或特定网络环境(如某些防火墙可能拦截 UDP)的兼容性问题。
-
UDP 端口开放:确保服务器的 UDP 443 端口(或其他你使用的端口)已在防火墙中打开。
-
多服务器配置:如果一台服务器配置了多个域名,在配置 HTTP/3 监听时可能需要特别注意
reuseport参数的使用,以避免端口冲突。
准备
官方的建议是使用 OpenSSL 3.5.1+ 的版本,或者 boringssl - Git at Google、GitHub - quictls/openssl: TLS/SSL and crypto library with QUIC APIs
根据自身的需求,下载最新版本的SSL以及最新版的Nginx:nginx: download。
截止到今天(2025年9月15日),通过包管理器安装到Nignx为 1.24.0 ,该版本不支持http3,需 1.25.0+ 才行。

如果想简单点的话,可以通过
add-apt-repository ppa:ondrej/nginx添加Ondřej Surý 维护的 Nginx 官方 PPA (Personal Package Archive) 仓库,接下来直接使用apt install nginx即可升级到1.28.0版本,与目前最新的1.29.1都能支持http3,就不用进行编译了。
安装编译所需的基础工具:
apt install build-essential libpcre3-dev zlib1g-dev git mercurial cmake golang ninja-build perl libperl-dev libxml2-dev libxslt1-dev libexpat-dev 编译
基于OpenSSL
一:下载OpenSSL以及Nginx
wget https://github.com/openssl/openssl/releases/download/openssl-3.5.2/openssl-3.5.2.tar.gz
tar -zxvf openssl-3.5.2.tar.gz
wget https://nginx.org/download/nginx-1.29.1.tar.gz
tar -zxvf nginx-1.29.1.tar.gz
二:编译配置
cd nginx-1.29.1
./configure \
--prefix=/etc/nginx \
--sbin-path=/usr/sbin/nginx \
--conf-path=/etc/nginx/nginx.conf \
--error-log-path=/var/log/nginx/error.log \
--http-log-path=/var/log/nginx/access.log \
--pid-path=/run/nginx.pid \
--lock-path=/run/nginx.lock \
\
--with-threads \
--with-file-aio \
--with-pcre \
--with-pcre-jit \
\
--with-openssl=../openssl-3.5.2 \ # 指向openssl的目录
--with-http_ssl_module \
--with-http_v2_module \
--with-http_v3_module \
--with-http_realip_module \
--with-http_addition_module \
--with-http_sub_module \
--with-http_dav_module \
--with-http_flv_module \
--with-http_mp4_module \
--with-http_gunzip_module \
--with-http_gzip_static_module \
--with-http_stub_status_module \
--with-http_random_index_module \
--with-http_secure_link_module \
--with-http_degradation_module \
--with-http_slice_module \
--with-http_auth_request_module \
\
--with-mail \
--with-mail_ssl_module \
--with-stream \
--with-stream_realip_module \
--with-stream_ssl_module \
\
--user=www-data \
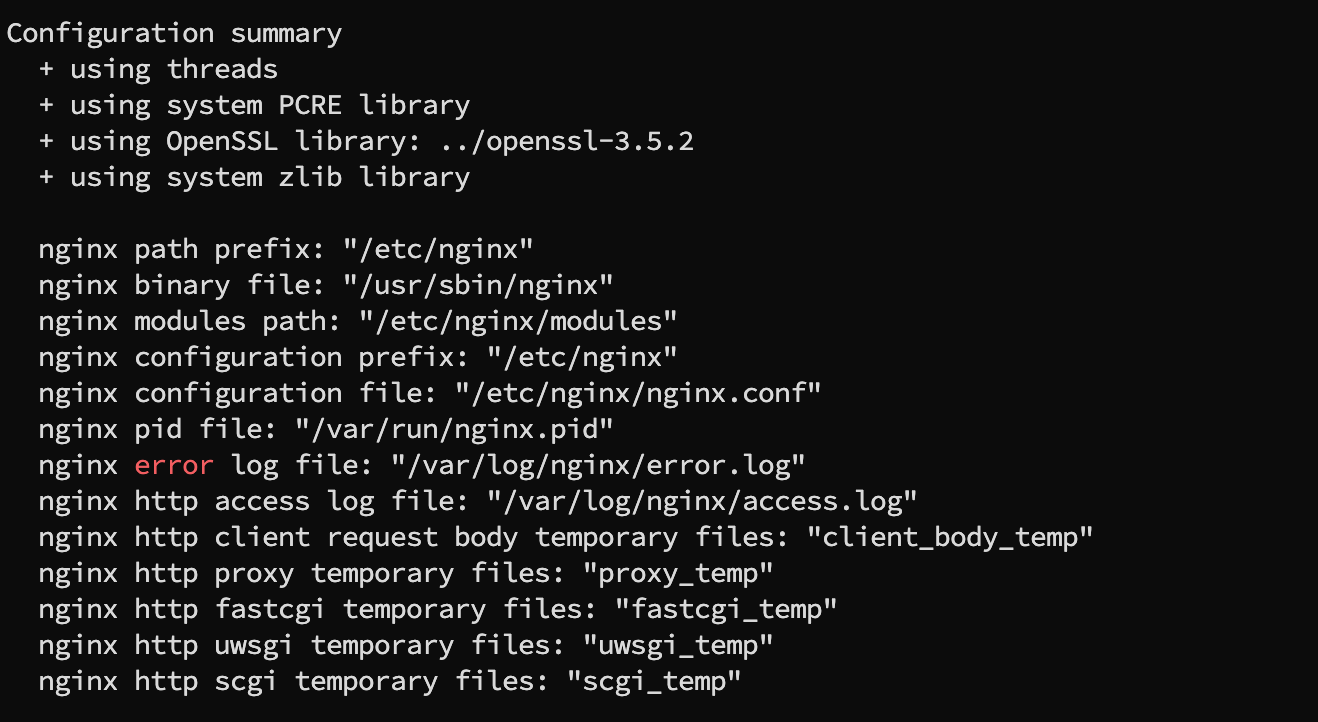
--group=www-data出现这个提示说明配置成功了:
三:编译和安装
make -j$(nproc)
sudo make install

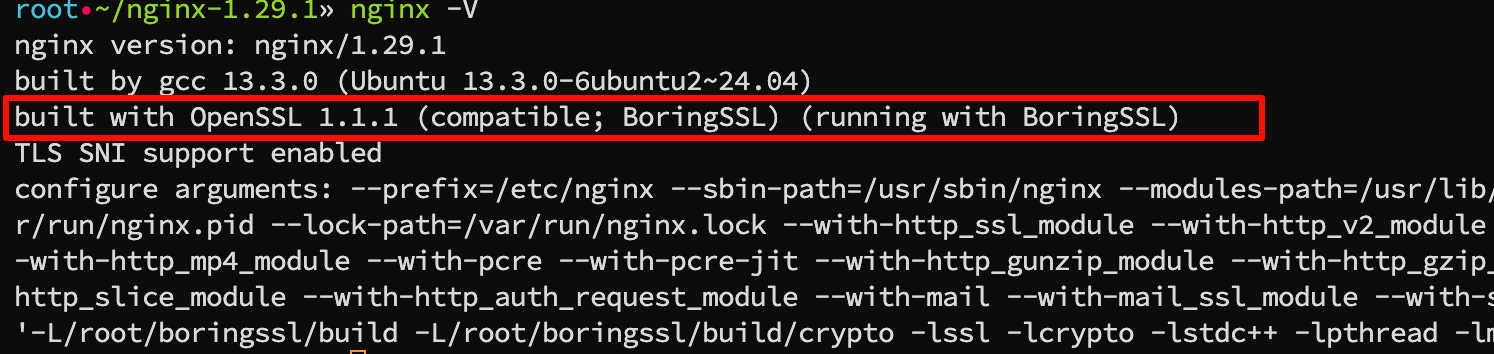
基于BoringSSL
一:下载BoringSSL以及Nginx
BoringSSL用国内网络下载可能比较麻烦,不过用国内镜像就行。
git clone https://gitee.com/mirrors/boringssl.git
wget https://nginx.org/download/nginx-1.29.1.tar.gz
tar -zxvf nginx-1.29.1.tar.gz
二:编译BoringSSL
cd boringssl
mkdir build && cd build  #创建构建目录
cmake .. -DCMAKE_BUILD_TYPE=Release  # 使用 cmake 编译
make -j$(nproc)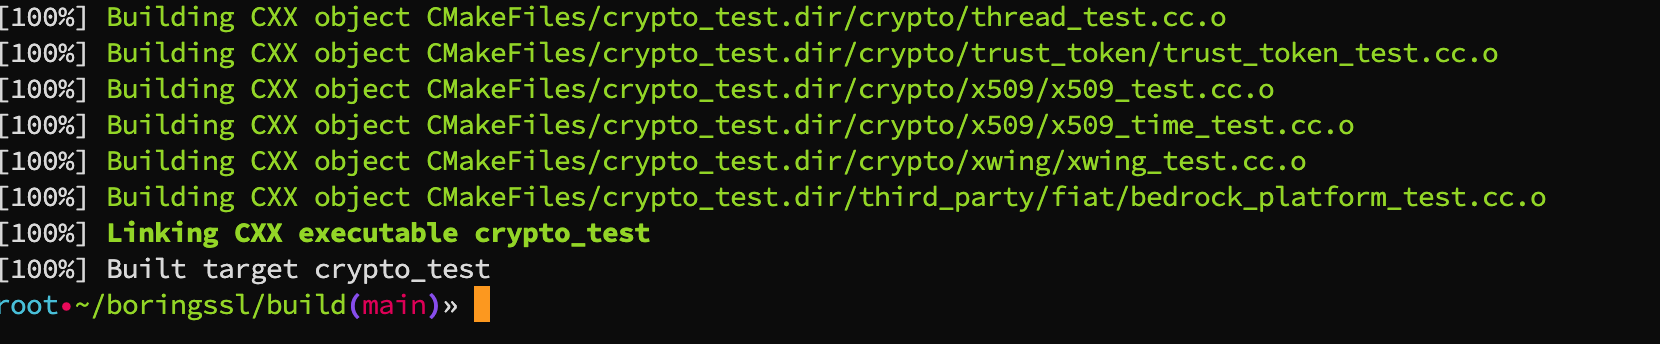
编译完成后,关键文件:
-
头文件:
boringssl/include/ -
静态库:
boringssl/build/libssl.a和boringssl/build/libcrypto.a
三:编译配置
cd nginx-1.29.1

./configure \
    --prefix=/etc/nginx \
    --sbin-path=/usr/sbin/nginx \
    --modules-path=/usr/lib/nginx/modules \
    --conf-path=/etc/nginx/nginx.conf \
    --error-log-path=/var/log/nginx/error.log \
    --http-log-path=/var/log/nginx/access.log \
    --pid-path=/run/nginx.pid \
    --lock-path=/run/nginx.lock \
    --with-http_ssl_module \
    --with-http_v2_module \
    --with-http_v3_module \
    --with-http_realip_module \
    --with-http_addition_module \
    --with-http_sub_module \
    --with-http_dav_module \
    --with-http_flv_module \
    --with-http_mp4_module \
    --with-pcre \
    --with-pcre-jit \
    --with-http_gunzip_module \
    --with-http_gzip_static_module \
    --with-http_stub_status_module \
    --with-http_random_index_module \
    --with-http_secure_link_module \
    --with-http_degradation_module \
    --with-http_slice_module \
    --with-http_auth_request_module \
    --with-mail \
    --with-mail_ssl_module \
    --with-stream \
    --with-stream_realip_module \
    --with-stream_ssl_module \
    --with-stream_ssl_preread_module \
    --with-cc-opt="-I/root/boringssl/include" \  #最重要的就是这两行,写绝对路径
    --with-ld-opt="-L/root/boringssl/build -L/root/boringssl/build/crypto -lssl -lcrypto -lstdc++ -lpthread -lm" \
    --user=www-data \
    --group=www-data \
    --with-threads \
    --with-file-aio \
    --with-compat
出现这个提示说明配置成功了:

四:编译和安装
make -j$(nproc)
sudo make install
创建系统服务
vim /etc/systemd/system/nginx.service粘贴以下内容(根据你的实际路径调整):
[Unit]
Description=nginx - high performance web server
After=network.target network-online.target
Documentation=https://nginx.org/en/docs/
Wants=network-online.target

[Service]
Type=forking
PIDFile=/run/nginx.pid
ExecStartPre=/usr/sbin/nginx -t -c /etc/nginx/nginx.conf
ExecStart=/usr/sbin/nginx -c /etc/nginx/nginx.conf
ExecReload=/usr/sbin/nginx -s reload
ExecStop=/usr/sbin/nginx -s stop
PrivateTmp=true
Restart=always

[Install]
WantedBy=multi-user.target
创建必要的目录和权限(如果不存在):
mkdir -p /var/cache/nginx /var/log/nginx
chown -R www-data:www-data /var/cache/nginx /var/log/nginx
systemctl daemon-reload
systemctl enable nginx
systemctl start nginx
systemctl status nginx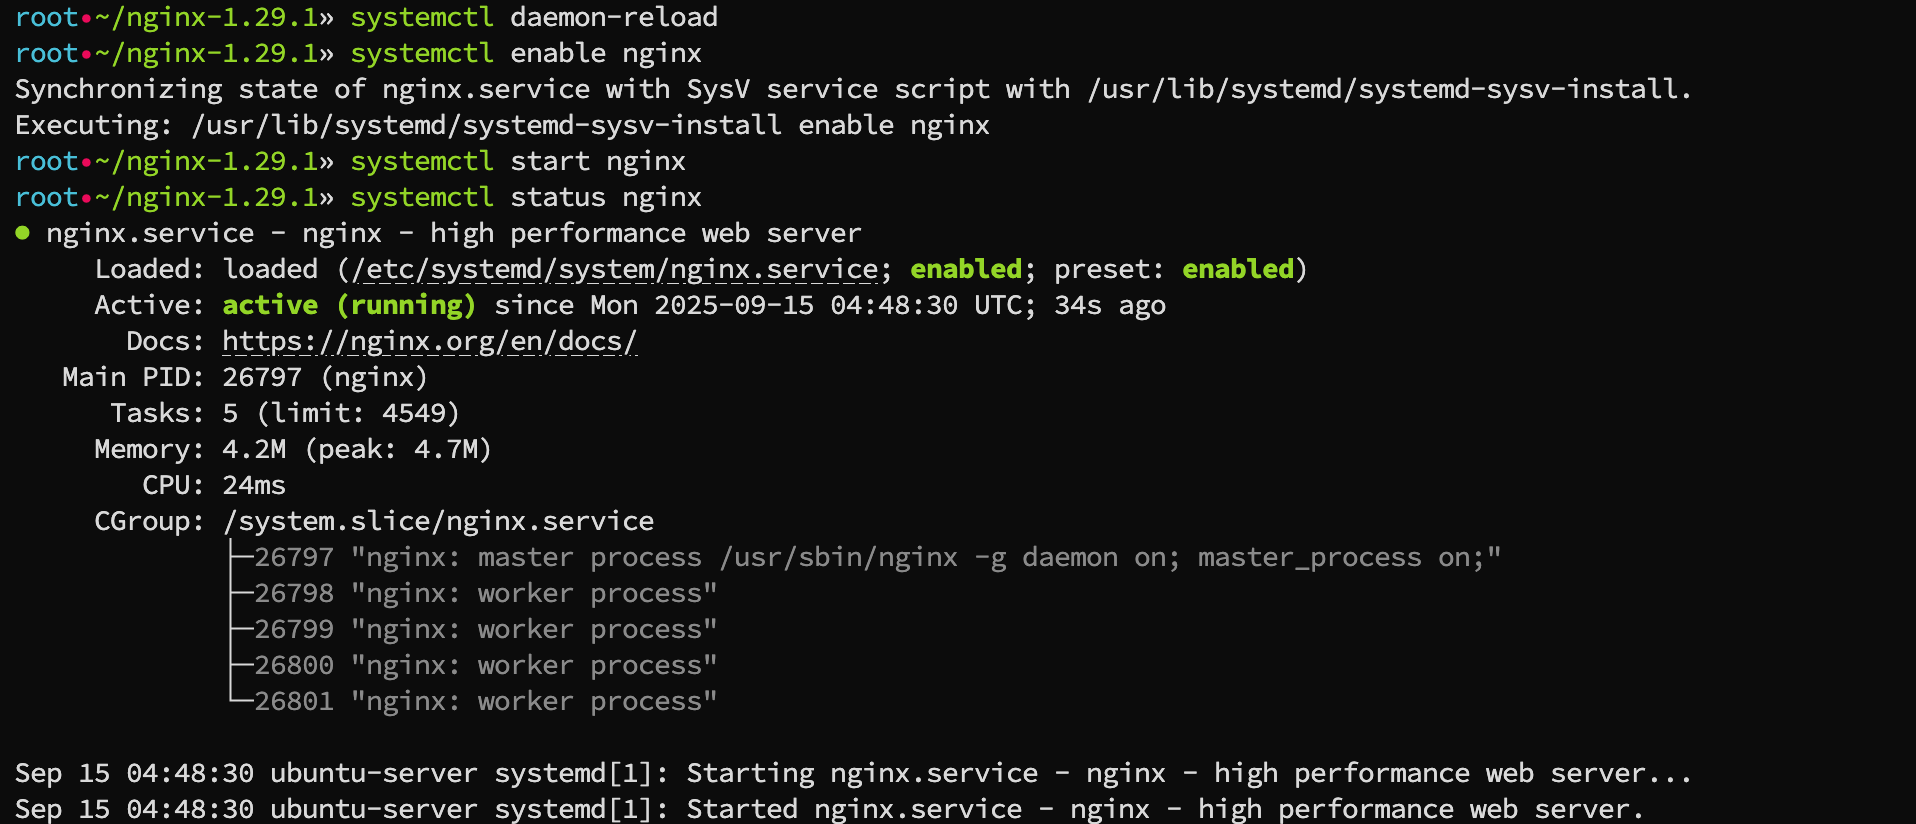

大功告成!
测试
注意:HTTP/3基于UDP 443端口,确保防火墙放行!
1:创建自签名证书(测试用)
# 创建证书目录
sudo mkdir -p /etc/nginx/certs

# 生成私钥和自签名证书(有效期 365 天)
sudo openssl req -x509 -nodes -days 365 -newkey rsa:2048 \
    -keyout /etc/nginx/certs/example.com.key \
    -out /etc/nginx/certs/example.com.crt \
    -subj "/CN=localhost"
2:简单配置
编辑/etc/nginx/nginx.conf ,在http块中添加内容如下:
server {
    # for better compatibility it's recommended
    # to use the same port for http/3 and https
    listen 443 ssl;
    listen 443 quic reuseport;

    http2 on;

    index index.htm index.html index.nginx-debian.html;

    ssl_protocols TLSv1.3;
    ssl_certificate     certs/example.com.crt;
    ssl_certificate_key certs/example.com.key;

    location / {
        # used to advertise the availability of HTTP/3
        add_header Alt-Svc 'h3=":443"; ma=86400';
    }
}
3:重新载入nginx
systemctl reload nginx4:访问网页
这里有个奇怪的现象,HTTP/3 并不是100%能够握手成功,不同浏览器反应的情况也不一样。
这次测试下来:
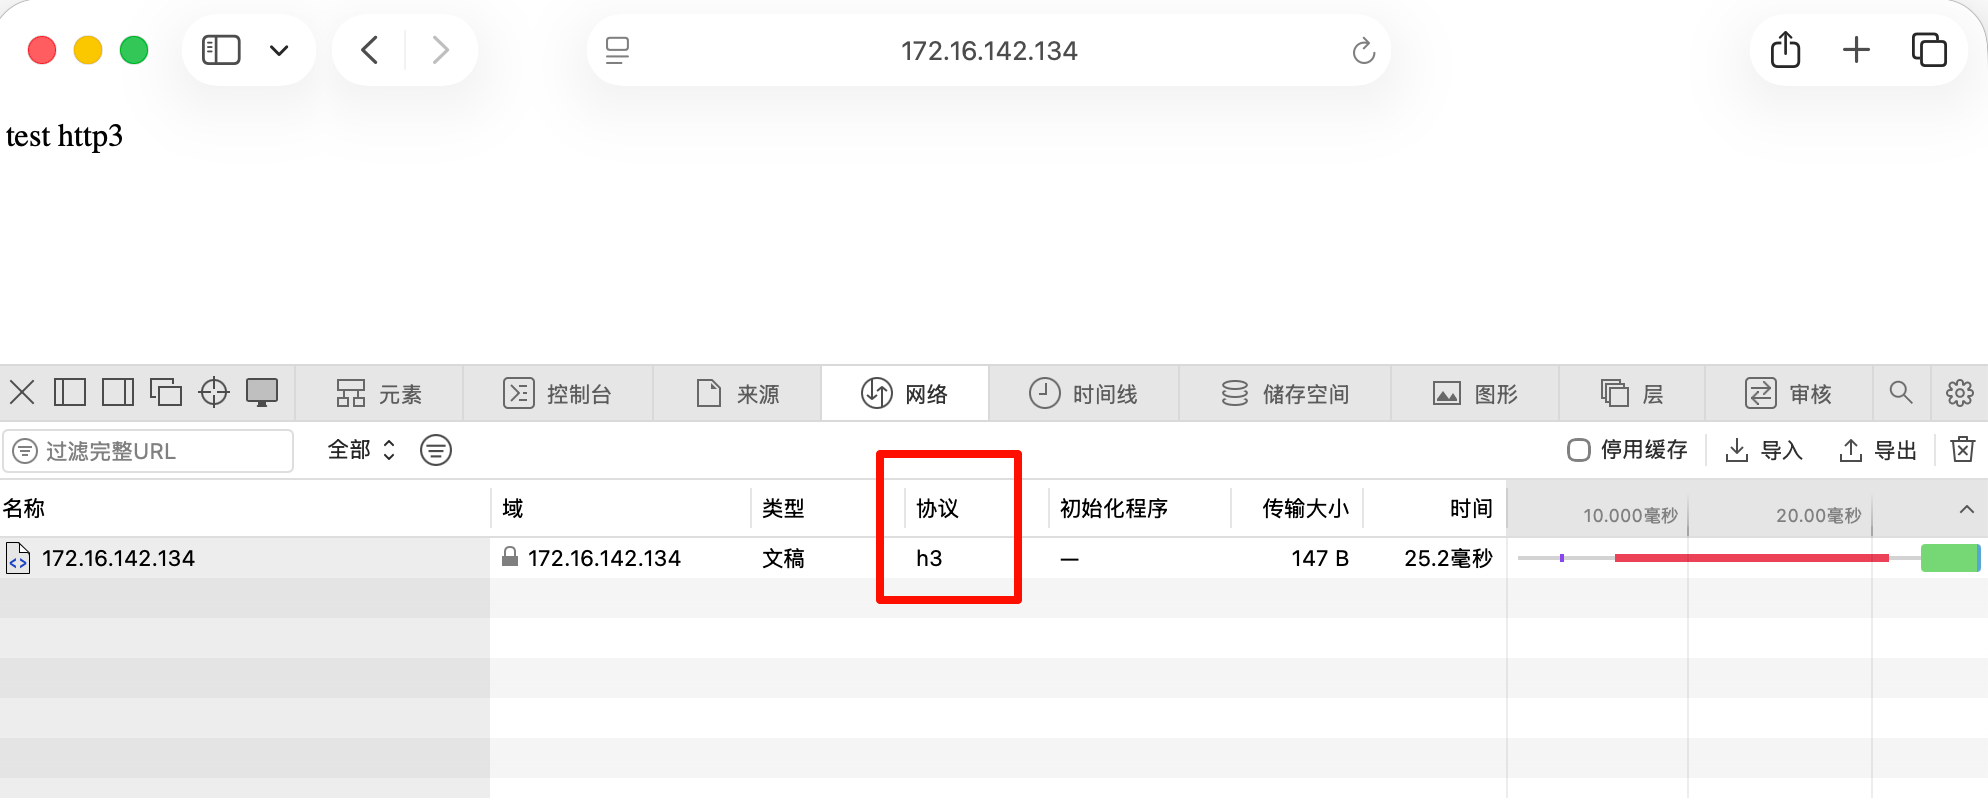
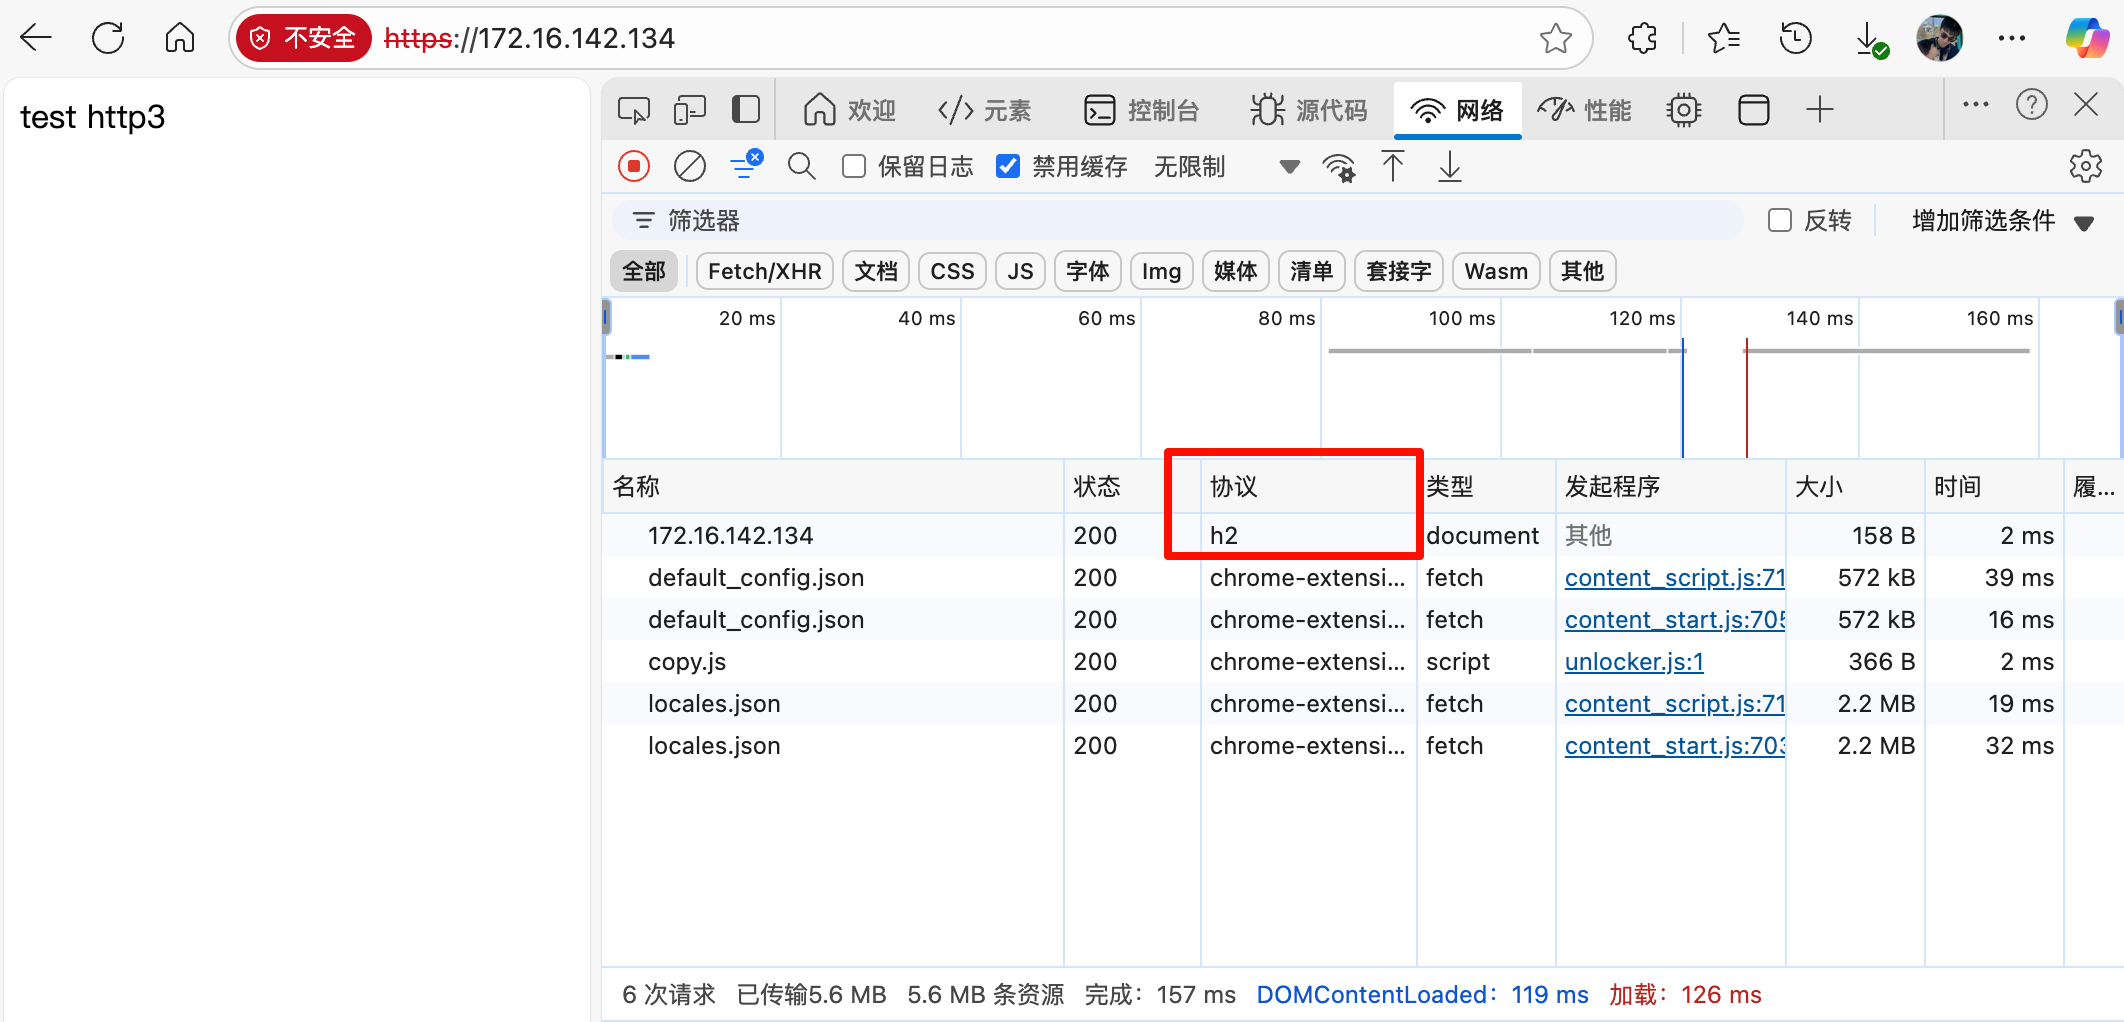
Chrome也显示的HTTP/2
最后
发表一下我的个人看法。
这两天其实一直在测试HTTP/3,从使用ondrej库安装,到自行编译,后来尝试了不同版本的OpenSSL,再尝试了官网涉及的BoringSSL,从本地测试,再到服务器上测试,过程不算坎坷,但是结果非常不稳定,相同的步骤、相同的配置,最终有显示HTTP/3的,大多数还是HTTP/2,而且,有一点非常令我困惑,成功握手HTTP/3后,打开页面的速度非常慢,远远不如HTTP/2。
这两天也查了很多关于HTTP/3的资料,非常有限,更多的推荐还是把网站代理到Cloudflare来支持HTTP/3。
至今也没搞懂,如果有懂的兄弟希望能帮我解惑。
记录一下这篇文章,等HTTP/3确定可行后,可以再来更新。